Flowers

Saturday, March 2, 2013

With the bugs, and the spiders, and the......scary dark corners?

I was going to take you to the very next part of the upstairs, but I decided to traverse DOWN those dark, thin, winding stairs......to the BASEMEMNT!  Because of the work we'll be doing on the banister re-do, our project will extend to the bottom of the stairs and into the hallway. 

I soooo missed having a basement for all those years we lived in California.  "Too much seismic activity" was one reason we couldn't have one, the other reason was the construction costs for excavating and still passing earthquake code were too high for any of the builders to want to take on.  So we missed out on 9 years of basement perks.  No cold storage (actually, storage in general was lousy), no cool, dark room to escape the Summer heat.  Most of my growing up years, my bedroom was in the basement, and I loved it.  Then same goes for Handyman.  We'd both move to the basement in a heartbeat, if that's where our bedroom was. Ahhhh.......We do enjoy the cool TV room during the Summer.

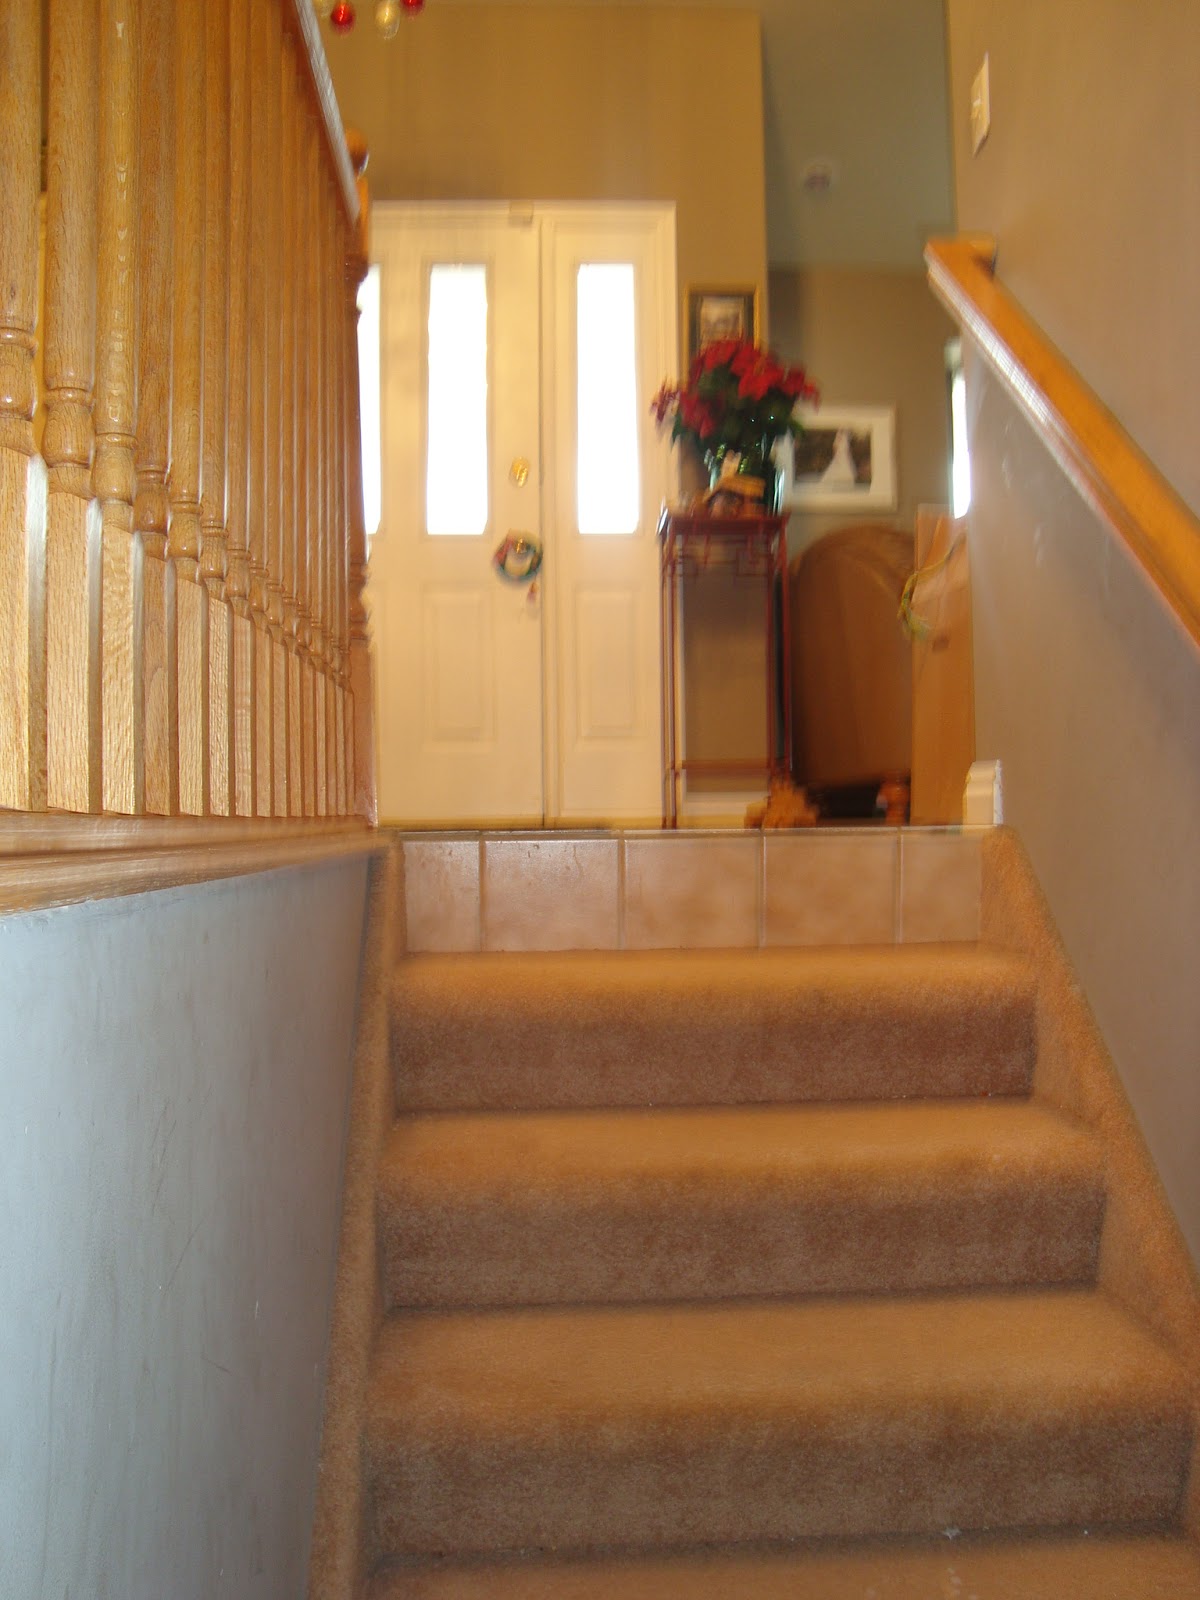
This is what you see as soon as you get to the bottom of the stairs.
There are 3 doors on this wall on the left.  The first is right at the bottom of the stairs and goes into the TV/Rec Room.  The next one is Tornado's room, and the third is the currently un-finished bedroom for Goat and Magician.  We're going to be teaching them some home improvement basics and and working with them, but they'll be doing most of the work themselves.  Their wives will LOVE having a handyman around.

The doorway that you can see into, is the Laundry Room.  It's also on the docket for 2013, and I'm sooooo excited!  I currently do all the laundry for our family of 8, in a laundry closet outside the Master bedroom.  This baby right here is just over 100 square feet of future Domestic Heaven!

The hallway going to the right goes to Nater and Bob's room (Goat and Magician are in there until their bedroom is done), a bathroom that will get an entire start to finish re-do, and an awkward nook plumbed and wired for a vanity with sink.  The Laundry room isn't plumbed for a sink, so this is where my laundry sink will go.  I wish I had more pics.  I thought I was SO thorough in taking pics, but I'm finding that my picture tour is severely lacking.

On the right - where the buckets and old mattresses are - is kind of a nook that will have a long, narrow table that the squiddos can put the laptops, books, and papers for studying, or fill the whole thing with a lego village.  We're planning on making 2 large "windows" in that wall that will look into my craft/sewing room.  It took a while to decide what to do with that room because it's odd-shaped and has no window or closet.....but more on that in another post. ;)


Looking back toward the stairs and toward the other part of the hall.

If you look closely at the ceiling, you'll see a few different ceiling elevations.  As with any basement, there is wiring, ductwork, plumbing, etc. that reside in that ceiling space.  The ceiling changes height in multiple different places and has made my desire for crown moulding have to be put aside.  It just won't work.  I do have an idea that will hopefully camouflage the plethora of changes.  I won't spoil all the surprises right now, though.

You can also see the weird door set-up at the bottom of the stairs.  Both the door on the left AND the door that are open, open into the same hallway.  The TV/Rec room is the third door, directly across from the closed door.  Those 2 doorways are coming out, and so is part of the wall on the left part of the stairs.  It will be replaced by open railings like upstairs will have. 

Where the hall juts off to the left, is the door to the craft/sewing room, and a large cold storage under my front porch.


There's a little storage space under the stairs and we're thinking of turning either turning it into a play house, or putting a large, cushioned reading nook in that corner.


Where the shelves are on the left, we're going to build in a library.  The wall is about 12' long, and the hallway is 6' through this section, so it will be a nice place for a library.  On the other side of that wall is Handyman's office.  The door at the very back leads to stairs that go right up into the garage.  VERY convenient.  Where the pile of carpet squares is, is now a Tech area for Handyman.  The door on the right is the utility room with furnaces, water heaters, water softeners, etc.  Just beyond that is a narrow hallway that has another bathroom, a small storage room, and leads to the second kitchen and TV room.  You can see more of the mish mash of ceiling heights here, too.


This is that narrow hallway.  First door is a bathroom (one of our 2013 projects), second door is a storage room (Handyman is working on this one, as I write) that will be where I store all my homeschool supplies.  The door you see way back there is the cold storage under my back porch.  This will be where extra/out of season clothes, seasonal decorations, paint, and toys are stored.

It's quite the hallway, eh?

The list:

·         Basement Hallway TO DO:
o   Paint
o   Board and batten?
o   Library wall outside office
o   Flooring
§  Carpet from upstairs family room/dining room after laminate is installed
o   Crown, base, and door moulding
o   Lighting
o   Brag shelves for
§  Knights awards
§  Scout derby cars, boats, rockets, etc
§  Scouting awards
§  Pictures from Shakespeare performances, etc.
§  Knick Knacks and souvenirs from family trips
o   Reading nook at base of stairs
o   Playhouse under stairs?
o   Open up wall between hallway and I-haven’t-decided-what-to-use-it-for-yet room
·         Basement Hallway DONE:
o   None
It's very likely that the only things to happen this year will be the stairs, paint, and carpeting from upstairs moved downstairs.  It's not a high-priority area, but I'm anxious to at least have it in a "finished" state, rather than bare concrete and primed walls.

Friday, March 1, 2013

"There's a dark, thin, winding stairway without any banister...."

*Sigh* The stairs.....NOT my favorite part of this house.  Stairways are important to me.  They make the entrance, in my opinion.  The entry already needs a huge dose of TLC, and this stairway doesn't help at all.  The last 2 homes we've owned, we fell in love with because of the grandness of the stairs.  (I so wanted to share a pic, but they're not on this comp.  I'll have to locate some.)  In fact, when we first moved to Cali 11 years ago, we knew it was the right house as soon as we walked in the front door and saw the stairs.  I'm afraid that if I had actually SEEN the house before we moved in, I would have said "No way!" 
Yep....we love great stairs. 

A picture is worth a thousand words, right?  This is our front walk and view from our porch.  Kinda brown and dreary because these were taken in December, but it's what I've got to work with at the moment. lol

We really have a great yard.  I can't wait to share non-Winter pics with you!
Not sure why I don't have a pic looking AT the front porch and door, but here's the FIRST thing you see when you walk in the house.
Kind of anti-climactic, huh?  NOT in love with the stairs, unfortunately.  Not even my cute little "NOEL" on the ledge or the....ummm....oddly placed mirror, can liven up the brown and dreary stairway.  Brown tile, brown banisters, brown/gray paint....FLAT paint, at that!  Let's just say flat paint, children, and stair wall are not a good combination.  I actually already painted this wall yellow, but I don't like it.  It's going to get repainted.  And HOW did I not include the awesomely outdated brass and glass chandelier in this pic?!?!  It's in a class of its own.

I mentioned the other day that the railing is pretty much about to fall over.  See that white piece of fabric on the right?  It's laying over a board, that's leaned agains the rail, where 2 of the balusters are missing because they BROKE within about 2 weeks of moving in.  The fabric actually keeps the board from falling over and chipping away the bull-nose corner on the opposite wall.  Yah....that happened a few times. 

Anywho....we're going to replace those skinny newel posts with something beefy enough to withstand my 6 crazy active boys, and build an entirely new set-up.  In true Reduce, Reuse, Recycle/DIY-style, allllll those balusters and newel posts will be repurposed into something.  I already have big plans for those. This is actually the next big project on the list because we're putting in new laminate flooring late Spring or early Summer and this has to be done first.  I REALLY want hand-scraped wood, but the laminate will have to do for now.  (But that's another post, entirely.) 

On the stair wall, we're sputting up wainscoting.  I soooooo wanted to do the oh-so-popular, architecturally stunning board and batten, but after patching a couple of 9-year-old boot-sized holes in the hall walls, we decided that wainscoting will give the super high traffic areas some much-needed sturdiness.  Function before fashion....Priorities!  The main areas of the main floor, the hallway, and the stairway will all have wainscoting.  I have some B&B planned for other places in the house because I lurve it and HAVE to have it somewhere!
 Ahhhh.....I found the pic looking toward the front door. :)  You can see all the fingerprints on the wall on the left.  Those don't wash off of flat paint.  This pic is over a year old and it's just.gotten.worse.....Ick!  I didn't paint it, because that part of the wall will be covered in wainscoting.
Yep.....it really did look like this when we moved in.  It's like they were painting, realized they were defaulting on the house, and then just put everything away and left it the way it was.  That big white oval is a REALLY bad patch job......covered by a splotchy coat of white, high-gloss paint.  A lot of the time, there are no words, just head shaking.  This is one of them. lol
         Stairs TO DO:
o   Large newel posts
o   Square balusters
o   Larger top rail
o   Wainscoting
o   Handrail
o   Picture gallery
o   Knock out doors at bottom of stairs
o   Gradually widen stairway at bottom and knock out bottom right wall
o   New lighting
o   Paint and re-install handrail
·         Stairs DONE:
o   Repair and paint walls
o   Remove carpet from trim

The not-so-musical Music Room

Yesterday, you saw my piano in my front room.  That's where it's been since we moved here 2 years ago, but that's not where it's staying.  I've learned over the last few houses that it sometimes takes a good while to know how you REALLY want and need to use each space.  This room has been a play room, a storage room, and a bedroom to 4 different people in different combinations.  We finally settled on it being the Music Room.  Not everyone needs a Music Room, but we decided that it was a must for us.  Handyman and I have both been playing the piano since childhood, 3 of our boys are currently taking lessons, and the rest will follow suit.  Tornado REALLY wants to learn how to play cello, so he'll probably start lessons next Fall.  Goat and Magician haven't decided yet if they want to play a second instrument, and we all love to sing.  So a music room is a must. :-) 

Nater and Bob are the room's current residents, but that will change in the next few months as we finish one more bedroom in the basement and move Goat and Magician into their permanent abode.  Tornado just moved into his this week, and we got Scooter (the baby now has a nick-name) settled in the Nursery/Guest room today.  Whew!  2+ years, and a dozen or more moves from this room to that room and back again, but we ALMOST have everyone settled into a long-term room.  Now the fun part starts because we can actually start decorating with a theme!

Without further adieu.........The Music Room


Meh......not sure what was going on that day.  I just wanted to get pics of the whole house, before I started changing things.  When I actually start this room, I'll get more and better pics.

·         Music Room TO DO:
o   Widen doorway and hang sliding barn doors
o   Turn other doorway into a framed bookshelf
o   Remove shelves from walls
o   Patch and paint
o   New trim
§  Doors
§  Window seat
o   New carpet
·         Music Room DONE:
o   Nada

Needless to say, this room is not high on the priority list.  It will likely be a year or more before we get to it.

Thursday, February 28, 2013

The "front room"

We've gone back and forth on what to do with this room.  It's been "the front room", "the music room", "the dining room" (that we never dined in, just stored the never-used dining set), and "the sitting room".  We finally settled on calling it "the front room" until we actually decided what to do with it. 

We do a lot of entertaining.  We LOVE to have families over for dinner and host Thanksgiving, Christmas, and other Holiday events.  We even had Handyman's family reunion at our house last August!  We love being with friends and family!  And we have lots of both. :-)  So we finally decided on making it a "formal dining" room, but not so heavy on the "formal" aspect of it.  We have a mish-mash of antiques and heirlooms from his family and from mine, so I'm working on bringing all of those together in this one room.  The only problem with making it a dining room is that it's totally cut off from the kitchen and family dining.  The kitchen is directly on the other side of the wall.  The plan is to open up that shared wall and thereby opening up all the spaces and improving the flow. 

Here are the "before" pics:


The kitchen backs these 2 walls that you see.


And here's our running list:
·         Front Room TO DO:
o   Frame windows
o   Window treatments
§  Shades from Grandma L’s drapes
§  Purple sheers tied back with strands of Grandma S’s jumbo pearls
o   Window bench pad from drapes
o   New dining table
o   Hang trio of silver platters
o   Do something with the crystal  candle holders
o   Grandma D’s lamps
§  Antique pewter in place of brass?
§  Bead trim for lamp shades?
o   Make chandelier
o   Find/make some chairs and benches
o   Laminate flooring
o   Columns/cabinets and beam
o   Open wall to kitchen
§  Pass-through cabinets
o   Refinish Grandma S’s Buffet
o   Hang Grandma D’s paintings
o   Grandma L’s Italian vase
·         Front Room DONE:
o   Repair and paint walls

I'm sure I'll add a whole lot more to this list before I'm done.  I'm actually very, very excited to do this room.  My favorite color is purple.......and I have all boys. :-( Not a frown on the all boys, a frown on never being able to have a purple-themed room.  Some of the antiques/heirlooms we have are......PURPLE!  I finally get to have my girly room!  Happy dance goin' on over here!

Do you have something you've always wanted to do with a room, but you've not been able to?  Please share!

Wednesday, February 27, 2013

To-Do lists

I was reading yesterday's blog post at Young House Love and was excited to see that I'm not the only list-obsessed DIY-er. tee hee I have a very similar, LOOOOONG, fairly detailed list of projects to do around here.  Since my camera is not functional at the moment, I'm going to post "before" pics galore, along with a list for each space.  I don't want to seriously overwhelm you with the master list....it's 9 pages long, not nearly as detailed as it will yet be, and it doesn't include any outside projects.  That outside project list will be equally long because we have 1.17 (or 1.19....Handyman and I can't agree on who remembers correctly. hahaha....details. ;) )

Logically, I'll start with the first thing you'll see when you come into our home: the entry.


Right through that doorway is the music room.  We plan on opening up that doorway to double-door size.  Gotta make room for that future baby grand piano. ;)


You can't tell in this pic, but that banister is seriously on its last leg.  It moves a full 8 inches in BOTH directions!  We have a friend who does finish carpentry and after having him look at it, we now know that it was never installed correctly.  It has to be completely redone.  No biggie.  With 6 boys, we definitely want to beef it up.


Most of our main floor is open above the walls like this.  On the other side of the 2 walls on the left, is the kitchen.  On the other side of the wall on the right, is the family room.
 
Here's the list:
·         Entry TO DO:
o   Frame doors – new French door?
o   Bench & hooks for visitor coats & boots
o   Refinish mirror frame
o   Paint front door
o   Re-seal front door
o   Paint storm door
o   Re-purpose old door from Mom’s house
o   Build new banister
o   New lighting
o   Laminate flooring
o   Wainscoting
o   Large rug for most of entry
o   Large framed pics of kiddos
o   Tongue & Groove ceiling with large beams
o   Enlarge doorway to music room and re-trim
·         Entry DONE:
o   Repair and paint walls (I won't be able to upload pics till I replace my battery.  Maybe I'll put some cell phone pics on here, just for the heck of it.)
So, yah.....I only have the walls painted.  But that was a HUGE project.  So huge, that it will be its own post entirely.  There was a LOT of wall damage when we moved in.


Tuesday, February 26, 2013

Boo!

Baby took my camera battery out of the wall charger and put it in his mouth. :(  I wasn't thinking and just dried it OFF instead of making sure it had time to dry OUT, and put it in the camera......and subsequently fried the battery.  So no good pics until I get a new battery.  Someday I'll have a really nice camera and learn how to use it....then you'll get great pics of my projects.  Bear with me through the crappy cell phone pic stage.

Saturday, February 23, 2013

Perfectionism.....it KILLS me!

In my love of DIY/design blogs, I look at a lot of them.  I love before and after pics and I love following a project and then seeing the big "reveal".  I keep wanting to have a "reveal" to post here.  But the projects really are SO HUGE, and SO MANY, that I don't have anything FINISHED. GAH!  I get part way through one thing and in order to even be organized enough to be functional and not hinder our homeschooling, I have to work on something else. 

Then in following The House of Smiths, I read this post about her kitchen re-style, part 5.  Part 5?  Yep.  It was then that I realized that I don't have to have any one room DONE in order to share it with you.  I worked really, REALLY, REALLY hard last year.  I did NOT want a repeat of the December 29 nightmare when I realized that my house STILL looked like I just moved in.

So, I'll share three of my favorite projects with you today.  My dining table, new wall paint, and new molding around our windows and door.

  Our dining room is kind of awkward.  Okay, really awkward.  See for yourself.

These pics were taken about 18 months ago, before I really had ANYTHING organized and before I had a designated sewing/craft area, so don't mind all the chaos on the table.....I was in the middle of a sewing project. lol

This is looking into the family room from the dining room.

 Taken from the same spot, looking across the dining room and out the back windows.  See that table?  That was Handyman's grandmother's table.  A very treasured set that hasn't fit our whole family around it since 2 kiddos ago (think 8 years!), but because it was his grandmother's, we couldn't just get rid of it.....so we kept using it and squeezing everybody around it.  Fortunately, one of his cousins has been wanting it for a very long time, and will be picking it up in the next couple of weeks.  It's been in the basement for about 3 months, just waiting for a new home.
 From the family room looking through the dining room the long way.  Having the bar there limits the size of the walk-way from the garage hall, through the dining room.  You can't see the garage hall from here.  The room is technically 12' x 15'.  But once you allow for a 4' walkway behind the hanging bar stools, and a walkway to the back door, it's more like 8' x 13'.  With the fancy legs on the dining table, we could never push the chairs in far enough on any side, to leave enough walking space that we didn't feel claustrophobic. 
 In this pic, you can see the garage hall.  And who puts carpet in the only designated eating area in the house.  I have days that it takes every ounce of willpower I can muster, to not rip up that carpet and paint the sub-floor.
It took a long time to finally figure out what we wanted to do, but  we knew that this room needed a long, narrow table.  Ana White to the rescue!  I fell in love with this Fancy X Farmhouse Table and knew we had to build it.  Per the plan, it's an 8' table, but we decided to alter it a little bit.  We have a large family and frequently have dinner guests, so we opted to make it a 10' table.  It's perfect!
Uh....yah....cell phone pic was all I could find. I'll take better pics soon.

Here are the after pics of the dining room.


Not great quality pics, but I just snapped them really quickly so I'd have something to show you.  I'll post more details on the projects AND better pics, next week. 

See, I really HAVE been working! ;)